Introduction
Ever wondered how to get those stunning first-person GoPro shots that make every ride look cinematic? Whether you’re biking through rugged trails, cruising on a motorcycle, or hitting the slopes, mounting your GoPro on a helmet is the best way to capture the action hands-free. But here’s the catch—doing it wrong can lead to shaky footage, discomfort, or even losing your camera mid-ride.
In this guide, we’ll break down the best methods to mount a GoPro on your helmet, ensuring stability, safety, and epic footage. By the end, you’ll know exactly which mount to choose, how to install it properly, and essential tips to maximize your shots. Let’s dive in!
1. Choosing the Right GoPro Helmet Mount
Not all helmet mounts are created equal. The right choice depends on your activity and the angle you want to achieve. Here’s a breakdown of the most popular options:
- Chin Mount – Best for motorcyclists and cyclists looking for an immersive first-person view.
- Top Mount – Offers a high vantage point, ideal for downhill bikers and snowboarders.
- Side Mount – Great for a dynamic, slightly off-center angle.
- Strap Mount – A flexible option for rental helmets or temporary setups.
- Vent Mount – Specifically for bicycle helmets, offering lightweight stability.
💡 Pro Tip: If you want a natural POV that mirrors what your eyes see, the chin mount is your best bet for motorcycles, while the top mount works great for adventure sports.
2. Step-by-Step Guide to Mounting Your GoPro
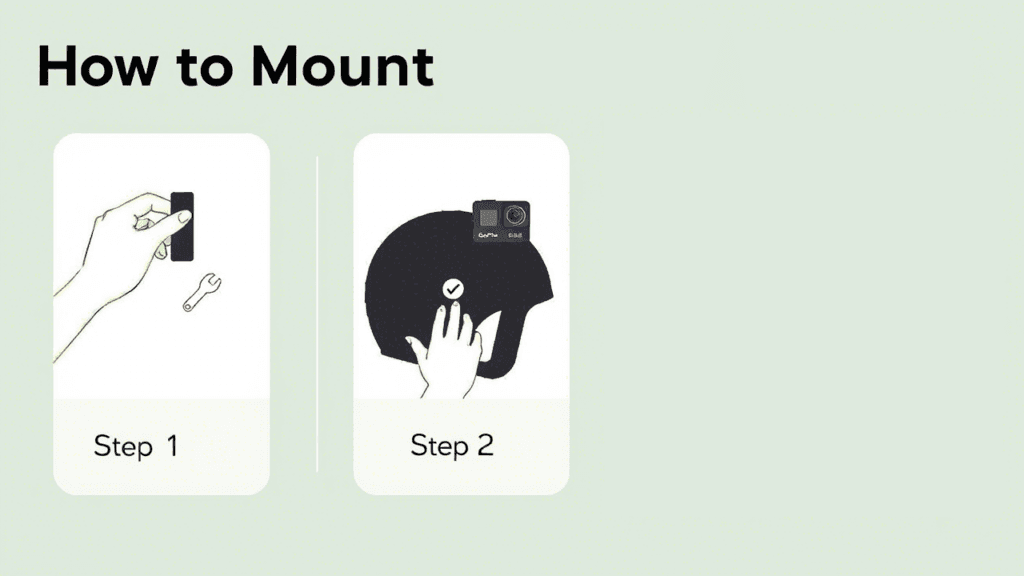
Installing your GoPro properly ensures stability and safety. Follow these steps for a secure setup:

For Adhesive Mounts (Chin, Top, Side)
- Clean the surface – Use alcohol wipes to remove dust and grease for a firm grip.
- Choose the right position – Mark the placement before applying the adhesive.
- Peel and stick – Press the mount firmly for 30 seconds.
- Let it set – Allow 24 hours for the adhesive to cure before use.
- Attach your GoPro – Use a J-hook buckle for flexibility in angles.
For Strap and Vent Mounts
- Align the mount with the helmet vents or straps.
- Thread the straps through the designated slots.
- Tighten securely without damaging the helmet’s structure.
- Test stability by shaking the helmet before recording.
🔧 Adjustment Tip: Use a short GoPro extension arm to tweak the camera angle for the perfect shot.
3. Best Camera Angles for Maximum Impact
Your footage is only as good as your angles! Here’s how to get cinematic, shake-free shots:
- Chin Mount POV – Best for immersive motorcycle riding.
- Top Mount Wide-Angle – Great for skiing and snowboarding.
- Side Mount Dynamic View – Adds a unique perspective to downhill biking.
- Helmet-Tilted View – Captures lean angles for motorcyclists.
🎥 Filming Tip: Use GoPro’s Hypersmooth stabilization and set your frame rate to 60 FPS for crisp, clear action shots.
4. Safety Tips & Legal Considerations
Before you ride off, consider these safety and legal factors:
- Check local laws – Some regions prohibit helmet modifications.
- Avoid obstructing vents – Proper airflow prevents fogging in motorcycle helmets.
- Use a safety tether – Prevent losing your GoPro in high-speed rides.
- Balance your helmet – Uneven weight can strain your neck over long rides.
🚨 Warning: Never drill holes into your helmet—it compromises safety and voids warranties.
5. Maintenance and Troubleshooting
Keeping your setup in top shape ensures long-lasting performance:
- Regularly check adhesive mounts – Replace if worn out.
- Tighten screws – Vibrations can loosen mounts over time.
- Clean your lens – Smudges ruin footage quality.
- Battery management – Carry spare batteries for long rides.
🛠️ Fixing Shaky Footage: Adjust GoPro’s stabilization settings, use a gimbal, or mount closer to your helmet to reduce vibrations.
Conclusion
Now you’re ready to mount your GoPro like a pro! With the right mount, angle, and setup, you can capture every thrilling moment of your ride in stunning quality. Whether you’re racing down a mountain or cruising the open road, a properly mounted GoPro transforms your adventure into cinematic gold.
So, which helmet mount will you try first? Get out there, hit record, and share your epic footage with the world! 🚀
FAQs
1. What’s the best GoPro mount for motorcycles?
The chin mount provides the most natural first-person view, making it the top choice for motorcyclists.
2. Can I mount a GoPro on any helmet?
Yes, but always check your helmet’s structure and local regulations before mounting.
3. How do I prevent my GoPro from falling off?
Use strong adhesive mounts and a safety tether as an extra precaution.
4. Does helmet mounting affect safety?
If done correctly with approved mounts, it should not compromise safety. Avoid drilling holes in your helmet.
5. What settings should I use for the best GoPro footage?
For smooth action shots, set your GoPro to 1080p or 4K, 60 FPS, and enable Hypersmooth stabilization.

